
-> This is the english version of my original blog-post from 2023, translated with ChatGPT.
Disclaimer: This lens wasn’t “kindly provided” by TTArtisan, as seems to be the case with half the YouTube influencers out there. I ordered it entirely on my own initiative and paid for it myself.
To be honest, third-party lenses for the Hasselblad X1D never really interested me. There are barely any with an XCD mount, and the usual adapter juggling always felt off-putting — especially from a quality perspective.
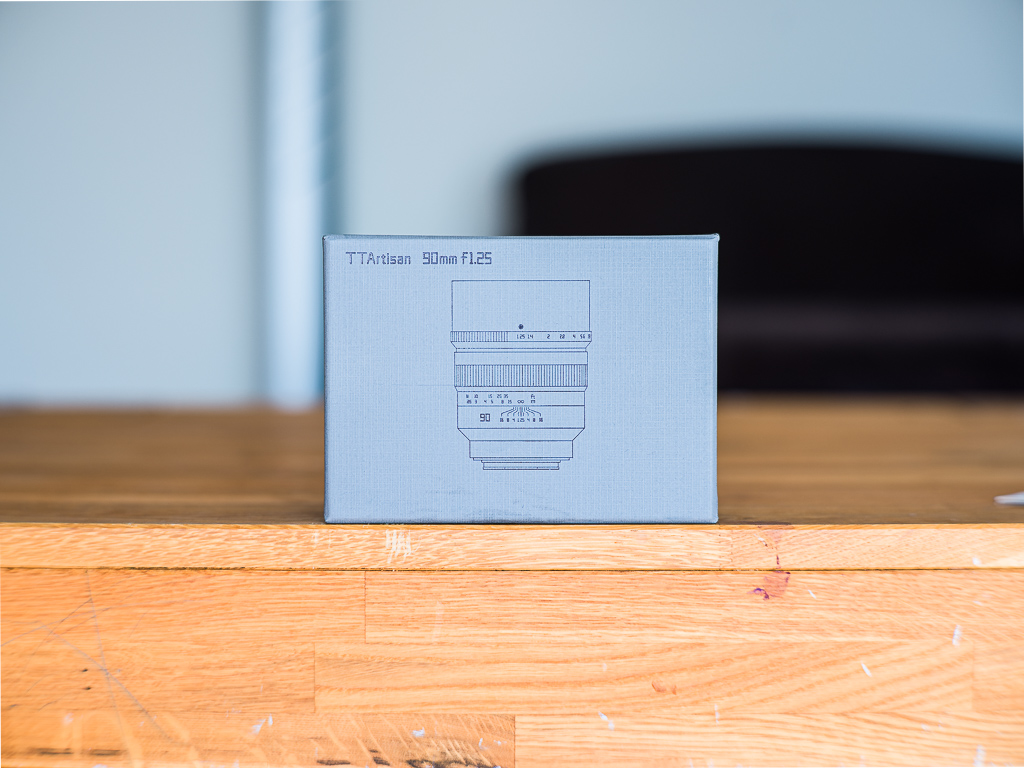
But when TTArtisan released the 90mm f/1.25 with native XCD mount, I got curious. Could a “bokeh monster” for just CHF 400 (!) really compete with the nearly ten-times-more-expensive XCD 90mm f/3.2?
Spoiler: That’s the wrong question to ask…
One quick note before we dive in: This isn’t a traditional lens test, so you won’t find untouched, unedited sample images here. This is about the creative potential the lens offers — and post-processing is very much part of that. Of course, exceptions are made to point out optical flaws…
Enough with the intro — let’s get into the real stuff.
Tabel of Contents
- Build Quality / Handling
- Technical Specifications
- Focussing
- Hasselblad-Specific Notes
- Optical Weaknesses
- Strengths
- Real-World Experience
- Conclusion
1. Build Quality / Handling
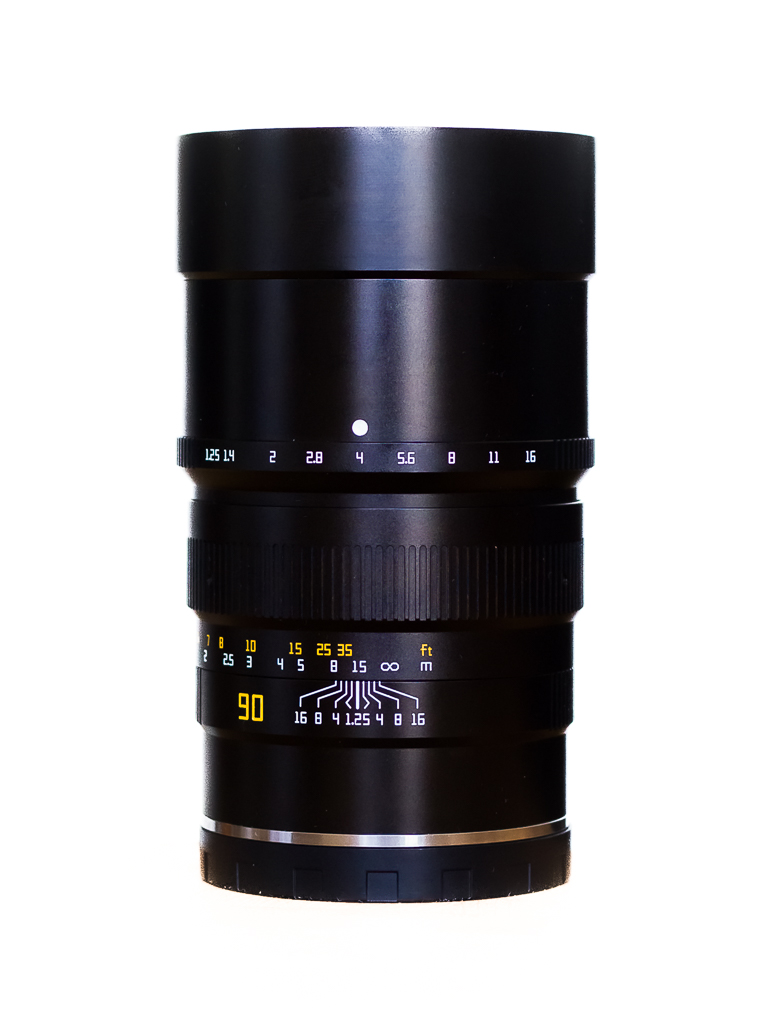
The build quality is simply phenomenal! When I first unboxed the lens, I almost dropped it — mainly because it’s surprisingly heavy for its relatively compact design. Apart from the rear lens cap and the fuzzy coating on the lens hood, everything is made of metal and glass.
Remove both lens caps and fully open the aperture, and you feel like you’re looking straight through a metal tube — seriously impressive. The aperture ring turns smoothly and clicks into place in full and half-stop increments. Personally, I wish there were a bit more resistance so you could count the clicks by feel — with your eye still on the viewfinder — when adjusting quickly (1 click = ½ stop).
The focus ring, on the other hand, is beautifully dampened — just how I like it — and rotates about 180°. There’s absolutely no play; everything feels solid and high-end. Honestly, every time I hold this anachronistic little lens, I catch myself grinning.
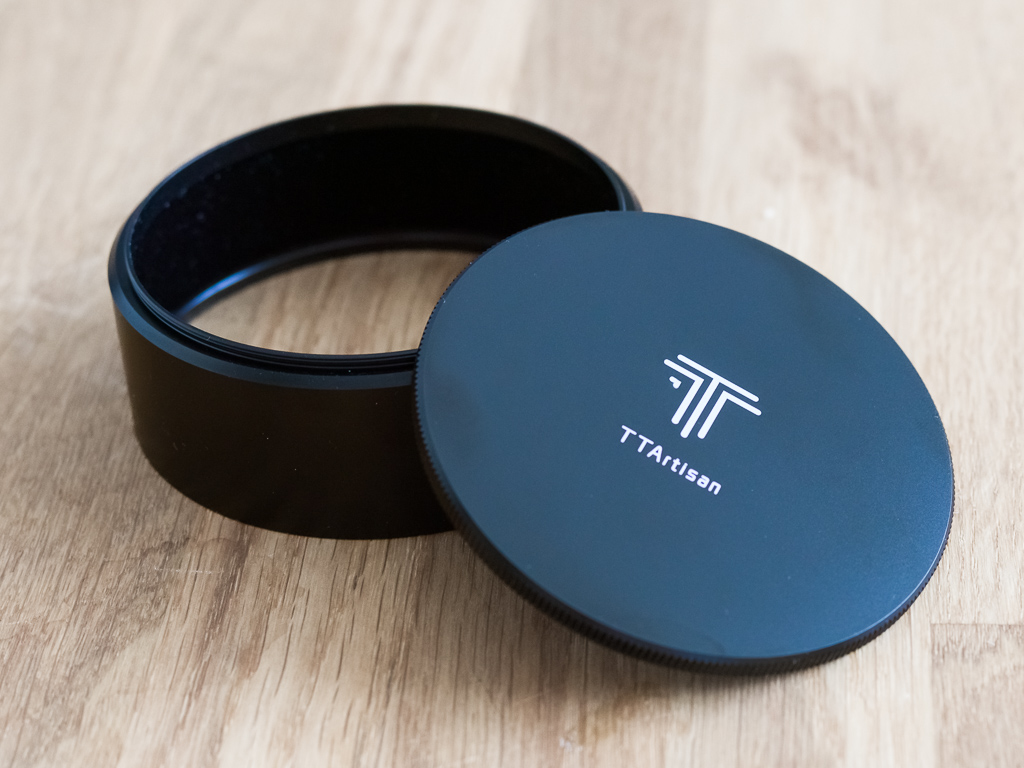
The front lens cap is a two-piece metal construction that slides on snugly (again — no play, just solid precision). Unscrew it (ring and cap), and you can flip the ring around and screw it back on to use as a lens hood. It’s a clever design, though depending on your workflow, maybe a bit fiddly. Personally, I don’t mind, since I usually leave the lens cap off and keep the hood mounted permanently anyway.

I hate to say it, but my way more expensive original Hasselblad XCD lenses honestly feel kind of cheap by comparison—not just in how they look, but especially how they feel in the hand. I get it, autofocus and those little motors need the lenses to be light and super smooth, and plastic just makes that easier than metal. But the downside is clear: they just don’t hold up as well over time. For example, the rubber on some of my XCD lenses is starting to peel off—not exactly something that puts a smile on my face. More like a raised eyebrow.
-> Update May 2025: The newer XCD-lenses as the V-Series, E-Series and some of the P-Series got rid of the rubber and feel much more solid and sturdy. See also my related X2D-blogpost.
2. Technical Specifications
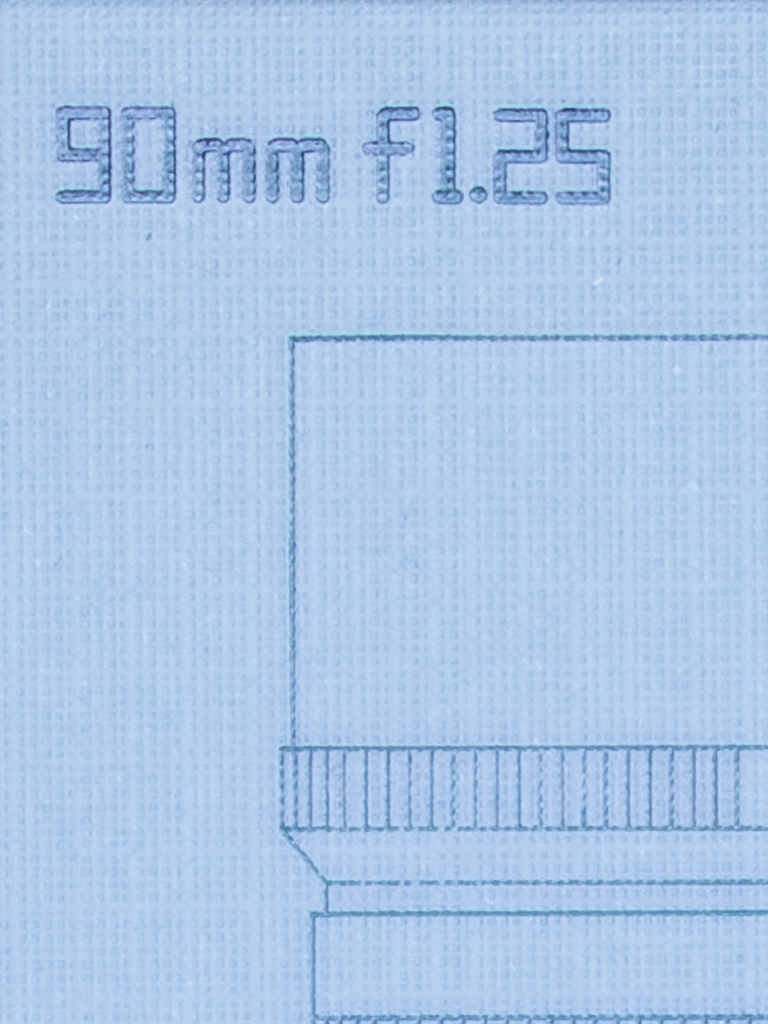
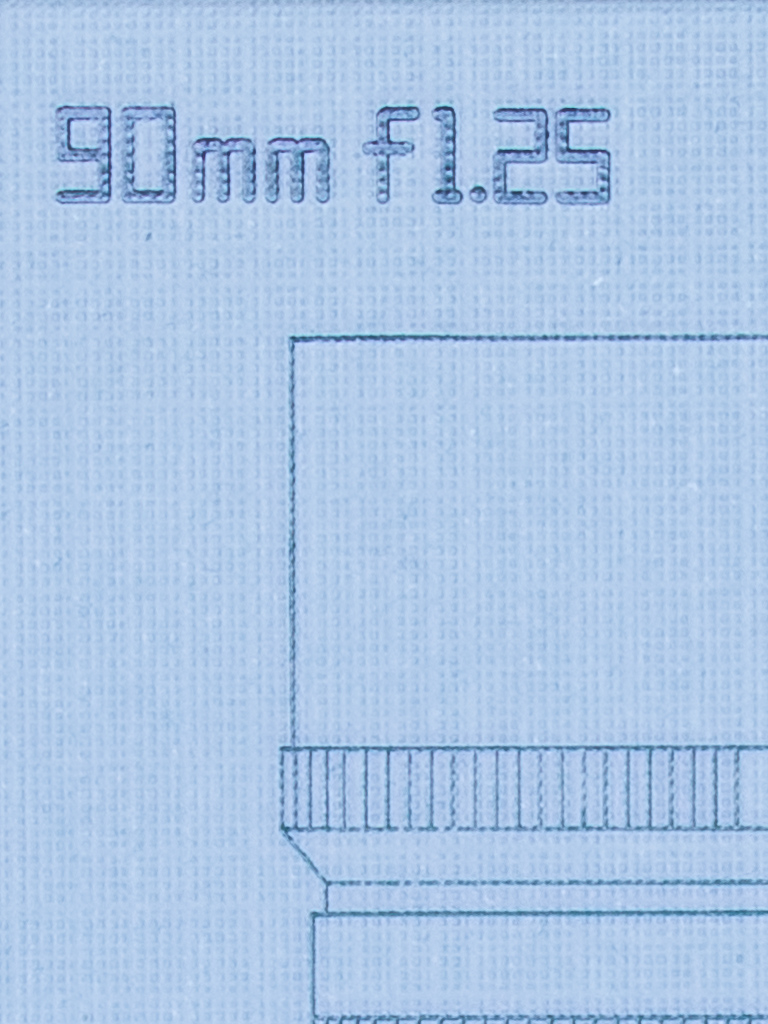
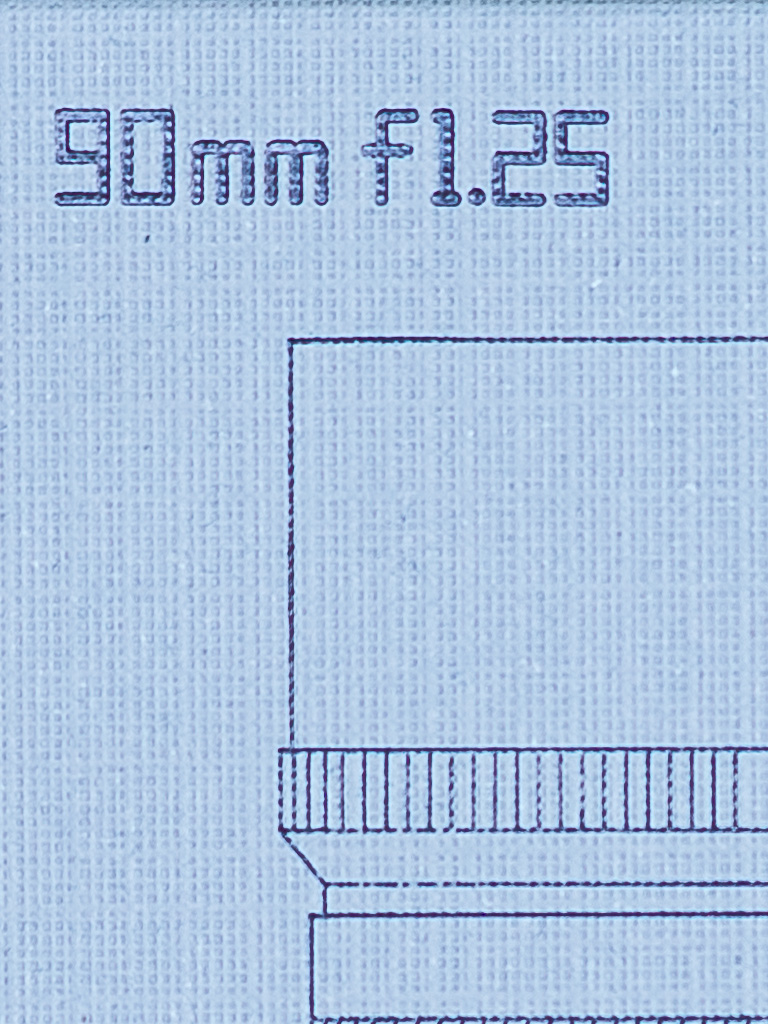
Well, the name of the lens already gives away the key specs: an impressive maximum aperture of 1.25 and a focal length of 90mm. But thanks to the larger medium format sensor of the X1D, the look you get is more like a 70mm f/0.95 on full frame (24×36)! The lens is available with different mounts—in my case, it’s fitted with the Hasselblad XCD bayonet.
The price—if you count that as a “technical spec”—lands somewhere between CHF 400 and CHF 530, depending on the exchange rate and where you order from.
It’s a fully manual lens, meaning: no autofocus, no automatic functions, and absolutely no communication with the camera—neither mechanical nor electronic. The only two bits of info the camera (or rather, the sensor) can “gather” from the lens are:
a) the aperture,
b) and the focus.
What that means in practice:
a) The sensor can’t actually read the aperture value, but it can see how much light is coming through. So when you stop down the lens, the camera notices the drop in brightness. In other words: aperture priority mode works! The whole shutter-and-aperture topic is kind of its own thing with Hasselblad anyway, since the original XCD lenses use leaf shutters—but more on that in section 4.
b) As for focus: the sensor doesn’t really “see” sharpness per se, but it can detect edge contrast. That info is used for tools like focus peaking, which highlights the in-focus areas. I’ll cover that more in chapter 3.

3. Focussing
Most SLRs used to come with a split-image focusing aid built right into the focusing screen. And honestly, it worked pretty well—accurate enough for the time. But back then, no one was zooming into their images at 100% to nitpick every pixel. If your photo looked reasonably sharp in print or projected on a slide screen, that was good enough.
These days, though, it’s a whole different game. Now that digital images get blown up on screen and inspected at full resolution, expectations have gone way up. The definition of what’s considered “sharp enough” has definitely shifted—what used to be fine is now often labeled as slightly off.
Modern digital cameras with electronic viewfinders no longer use split-image focusing, but they do offer other tools for manual focusing: 100% magnification right in the viewfinder or screen, and focus peaking. The magnification method is by far the most precise when it comes to nailing focus—but in practice, it can be a bit tricky. Even at 90mm, you need a steady hand just to keep the magnified area from jittering around. Plus, while you’re zoomed in, you lose sight of your overall composition.
Focus peaking, on the other hand, is much easier to use in the field, but in my experience, it’s not quite as precise or reliable. The way it works: the camera detects micro-contrast at edges and highlights them with a colored outline. With good lighting and strong edges, it works great. But with low-contrast subjects, it can struggle. Focusing on eyes in a portrait, for example, can be a pain—eyes are often in the shadows and don’t offer much contrast. Whether that’s a Hasselblad-specific issue or just a general limitation of the system, I honestly don’t know.
Bottom line: there’s no one-size-fits-all focusing method. What works best really depends on the situation, the subject, and of course, your personal preferences.
You can make life easier by stopping down the aperture. That increases depth of field, so small focus errors become less noticeable. But let’s be honest—if I’m going to stop down anyway, why did I buy a super fast lens in the first place? I could’ve just stuck with my XCD 90mm f/3.2…
You’ve got to embrace the lens and the whole manual focusing process a bit. Once you do, your hit rate of sharp shots goes up noticeably.
-> Update May 2025: The X2D offers the ability to zoom to 100% by pressing the rear command dial. This is significantly easier than having to find the corresponding button blindly on the X1D. This essentially small change substantially simplifies manual focusing! See my related X2D-blogpost.
4. Hasselblad-Specific Notes
The TTArtisan 90mm f/1.25 was originally designed for the Leica M mount (and yeah, the design resemblance to the CHF 13,000 Leica Summilux 90mm f/1.5 Asph. is… let’s say, not entirely coincidental—some might even call it bold 😉). Later on, TTArtisan rolled out versions for other mirrorless systems, and eventually even added a mount for the Hasselblad XCD.
That last one’s a bit of an oddball, though, because Hasselblad bodies don’t have a mechanical shutter. On native XCD lenses, both the aperture and the (leaf) shutter are built into the lens itself. But since the TTArtisan doesn’t have a shutter inside, you’re stuck using Hasselblad’s electronic shutter only.
And that comes with a few quirks worth knowing about:
Banding (weird horizontal lines, especially under artificial lighting), and
Rolling shutter (objects can appear distorted, especially when there’s movement or if you pan quickly).
As far as I know, banding only shows up under artificial lighting—anyone who’s ever tried taking a photo of a TV screen or computer monitor knows exactly what I mean. Thankfully, it’s pretty easy to avoid: just use slower shutter speeds, usually around 1/30 sec or longer (though it depends on the frequency of the light source).

The rolling shutter effect is way trickier to avoid. It happens because with the electronic shutter, the image isn’t captured all at once but line by line. So if either the subject or the camera moves during the exposure, you end up with distorted images. Sports photography? Forget about it. Even when shooting still subjects, you have to be careful not to lift the camera too soon—especially since there’s no shutter sound to tell you when the exposure is done.


Switching between the TTArtisan and the original XCD lenses can be a bit of a hassle, since you have to adjust the camera settings every time you change lenses. Sure, you can save different “custom” profiles, but you still have to remember to switch them.
That said, the electronic shutter also has its perks. The lack of any shutter noise means shooting is completely silent—perfect for situations where you need to be discreet, like in churches or concerts. Another big plus is the insanely fast shutter speeds you can get. On a sunny day shooting wide open at f/1.25, you might end up with shutter speeds of 1/10,000 sec or faster—something the mechanical shutter simply can’t do without using a neutral density filter.
5. Optical Weaknesses
It’s logical and understandable that when you combine “super fast” and “budget-friendly,” you have to accept some compromises in image quality. Specifically, we’re talking about things like vignetting, purple fringing, distortion, flare, and sharpness/contrast issues—especially up close and around the edges or corners of the frame.
Since the X1D has a larger medium format sensor, vignetting is naturally more noticeable than on full-frame cameras. You can only fix this manually in post-processing. Lightroom (as an example) doesn’t have a built-in lens profile for automatic corrections with this lens. Usually, the vignetting slider under the “Lens Corrections” tab in Lightroom is enough. The vignetting option under the “Effects” tab tends to be less effective, at least from my experience.


Purple fringing mostly shows up in backlit situations. The TTArtisan is pretty prone to it, but it’s usually easy to fix in post-processing.
Distortion is most noticeable along straight lines at the edges of the frame—think architectural shots. For landscapes or portraits, it’s usually not a big deal.

Flares happen when there’s a strong light source in or just outside the frame. They’re basically impossible to fix in post—you either have to live with them, avoid them, or use them creatively as a design element. Whether the TTArtisan is prone to flares because of its short lens hood or lack of lens coatings or both, I can’t say for sure.

In my opinion, the biggest compromise has to be made in the close-up range. Actually, it’s not just a compromise anymore—it’s a real drawback. The minimum focusing distance of about one meter is already quite long, and the image quality at that distance when shooting wide open is simply poor: low contrast, flat, and blurry. Stopping down helps (see example shots), but the TTArtisan definitely isn’t a lens for close-up work. Which is a shame, because with such a tiny depth of field close up, you could create some really unique and stunning effects.

As expected, contrast and sharpness drop noticeably towards the edges and corners—especially wide open. Stopping down helps here too, but only to a certain extent.
6. Strengths
The biggest strength—and probably the main reason most people buy this lens—is its insanely wide aperture and the look that comes with it. At f/1.25, it’s a true bokeh monster. With natural, organic shapes, the bokeh is super smooth and creamy. Sharp edges and straight lines can sometimes look a bit busy or restless. Bright light sources can occasionally take on a slightly lemon-shaped rather than perfectly round form.

So far, pretty much as expected. But what really surprised me—in a good way—is the excellent sharpness right in the center, even at f/1.25 (excluding close-up shots, as mentioned earlier).

And last but not least, I want to once again highlight the outstanding build quality that I already praised in Chapter 1.
7. Real-World Experience
Technical specs are one thing, practical experience is another. Some things you only notice when you actually use the gear, and other things you thought were important beforehand end up being totally irrelevant. This lens is no different—in fact, that contrast is pretty strong here.
After a few test shots at home in my living room, mainly to check the focusing methods and optical quirks I mentioned earlier, I was really curious how the Hasselblad X1D paired with the TTArtisan 1.25/90mm would perform out in the wild—the “real world,” so to speak.
On my first photo walk, I just shot whatever seemed interesting—different apertures, various distances, different subjects—but clearly focusing on wide-open shooting. Back at home, I analyzed the images on my big monitor and compared the results to my earlier living room tests. Over time, a few key points stood out that I think are especially worth keeping in mind when shooting with this lens.
First and foremost: manual focusing. Thirty years ago it was standard; today it’s “stone age tech” and you have to get used to it (again). What worked well for me was a two-step approach: quick, rough pre-focus using focus peaking, then fine-tuning with the magnification function.
Second: I realized I really don’t need an aperture ring on this lens—because I pretty much always shoot wide open anyway. The optical weaknesses I mentioned in Chapter 5 basically fade into the background then, and the 3D pop of the image really shines. If I switch to classic landscape photography with deep depth of field, those flaws become much more noticeable. Wait… didn’t I say earlier that stopping down reduces image errors? Yes, but only relatively speaking. Meaning: when you shoot stopped down for a “normal” look, image quality drops noticeably compared to the Hasselblad XCD 3.2/90mm. The original Hasselblad glass is better than the TTArtisan at any aperture—except when you want super-wide apertures below f/3.2, which the Hasselblad simply doesn’t offer.
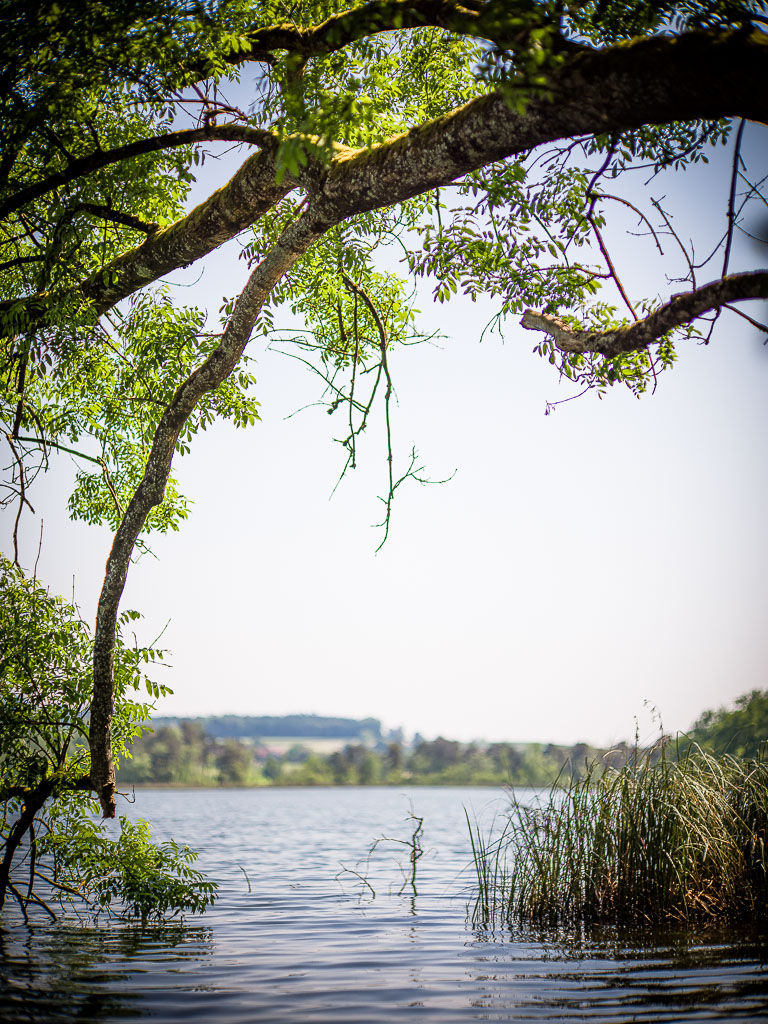
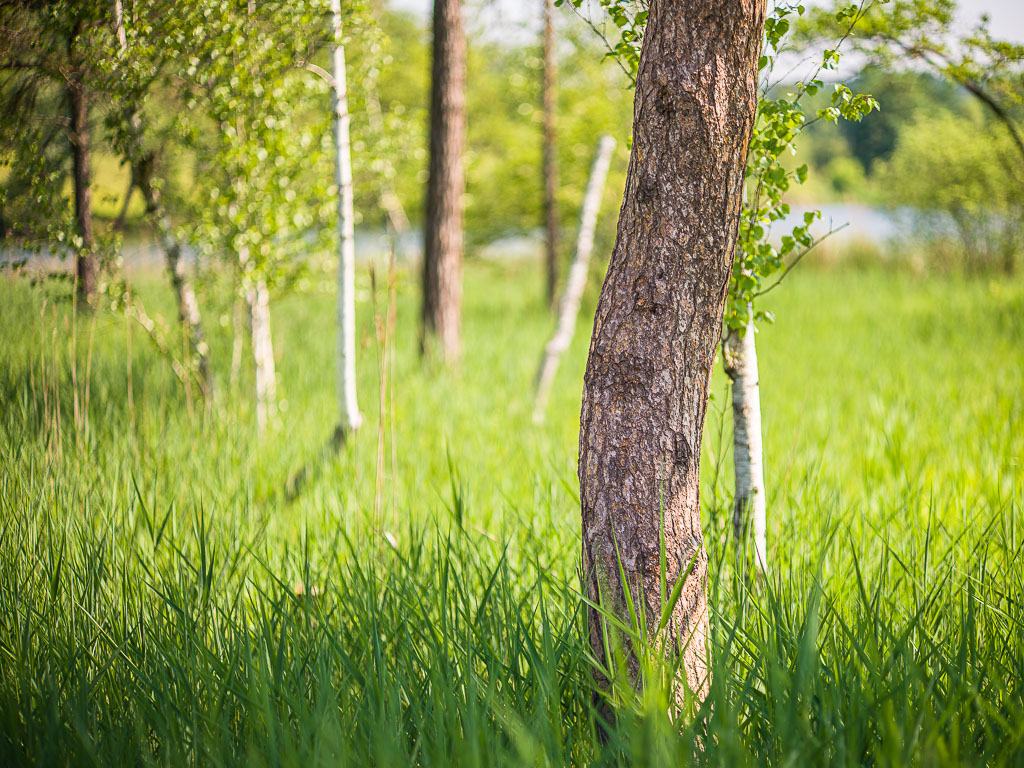
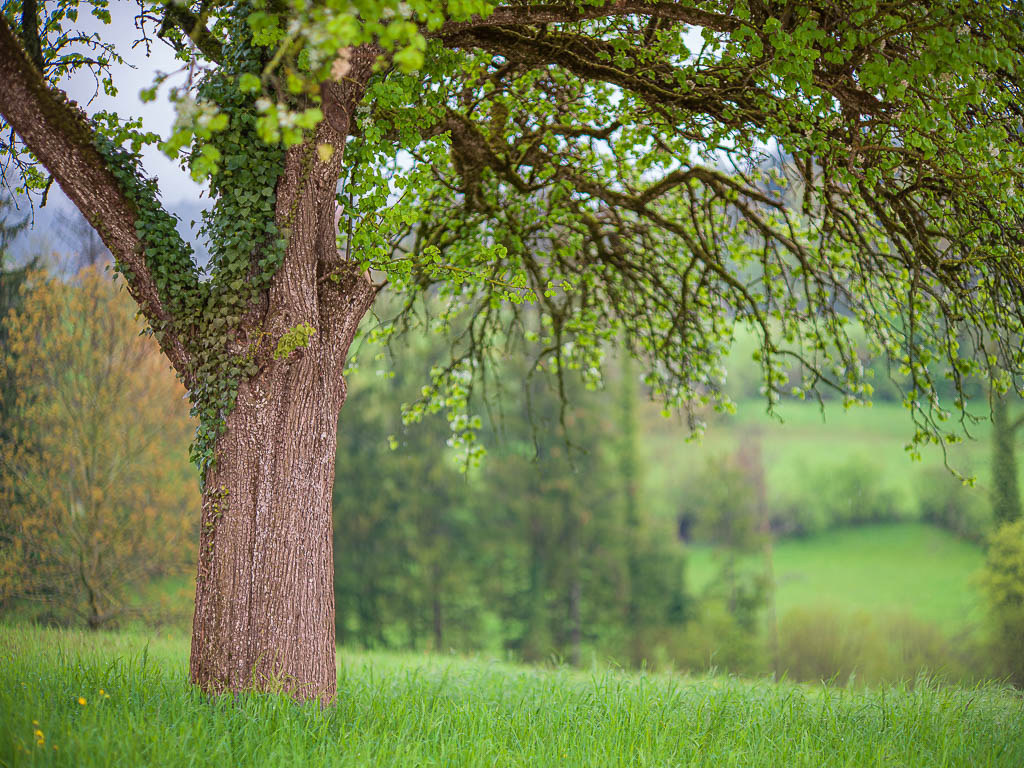
Another point is choosing your subject carefully. When you hear “fast lens” and “background blur,” you immediately think classic subjects: portraits against a cityscape, or a single tree in front of an alpine panorama. Always a main subject in front of a more or less endless background. Sure, an aperture of f/1.25 creates way more blur and bokeh than f/2.8; but you really only notice that when you compare side by side. The most impressive effect, in my opinion, happens when you have multiple planes of focus in the shot—not just one person or one tree, but several people or several trees at different distances and thus different levels of sharpness and blur. That creates incredible depth and draws you into the image like a magnet!


Regarding portraits: My guess—or hope—that the TTArtisan would turn out to be a perfect portrait lens was only partly true. The lack of sharpness and the weak contrast at close range might be acceptable—or even desirable—for certain types of portraits. The real challenge is the tiny depth of field at wide open aperture combined with manual focusing. Pinpoint focusing using 100% magnification on the model’s pupil (because focus peaking is way too imprecise here) is doable, but if the model moves even a millimeter between focusing and shooting, it’s a problem… Sometimes even the slightest tilt of the camera to adjust the composition can push the pupil out of the focus zone. When you have two people in the frame, it’s practically impossible to keep both in focus. Even in a straightforward frontal portrait of one person, one eye can be sharp while the other is already a bit out of focus if the face isn’t perfectly perpendicular to the lens axis. That means you not only need a very patient model, but you also have to pay close attention to their position and pose (see the previous section for more on this). To be clear, I’m not saying you can’t shoot portraits with this lens. If everything lines up perfectly, the results can be absolutely impressive—but the reject rate is pretty high.
8. Conclusion
Although Chapter 5 (Weaknesses) is noticeably longer than Chapter 6 (Strengths), TTArtisan really got a lot right. Fantastic bokeh and sharpness in the center, combined with outstanding build quality—all at a very reasonable price. The other features like corner image quality, automatic functions, autofocus, and distortion would have driven the price way up. With the Leica Summilux-M 1.5/90mm—which the TTArtisan even visually resembles—those weaknesses are mostliy eliminated (I suspect), making it fully suitable for everyday use—but at a price tag of around CHF 13’000!
So it’s clear why the initial question, “Can the TTArtisan compete with the XCD 3.2/90mm?” is the wrong way to look at it: These two lenses are playing on different fields. They don’t compete—they complement each other.
The TTArtisan 1.25/90mm isn’t a run-of-the-mill documentary lens—it’s a DREAM CATCHER. If you’re after a technically flawless all-rounder, this lens probably isn’t for you. But if you want something to capture special moments and offer a different way of seeing, you’ll have a lot of fun with it.
General characteristics
- More suited for landscape and nature photography, only somewhat suitable for portraits and architecture
- Lens cap and lens hood are clever but a bit unusual
- Fully manual, zero communication between lens and camera
- 90mm f/1.25 on the small medium format roughly equals 70mm f/0.95 on full-frame!
Pro’s
- Bokeh monster (light spots sometimes lemon-shaped, not perfectly round)
- Surprisingly good sharpness in mid and far distances
- Impressive build quality — heavy, all metal and glass
- Shutter priority (aperture priority) works because the electronic viewfinder detects the set aperture or the light hitting the sensor and adjusts accordingly
- Affordable price
Con’s
- Vignetting (especially on the medium format sensor), but somewhat correctable
- Distortion present
- Purple fringing in backlight, but easy to fix in post
- Bokeh around straight edges can look a bit restless
- Sharpness/contrast up close is really poor
- Not weather-sealed, so be careful in rain
- Focusing tricky wide open, with only a few millimeters of sharpness zone
- Focus peaking can be inaccurate (maybe an X1D-specific issue?), especially on eyes in portraits
- Hasselblad-specific: only works with electronic shutter, which means issues with rolling shutter and banding (striping under artificial light). On the plus side, allows much shorter exposure times (and you kinda need that…)
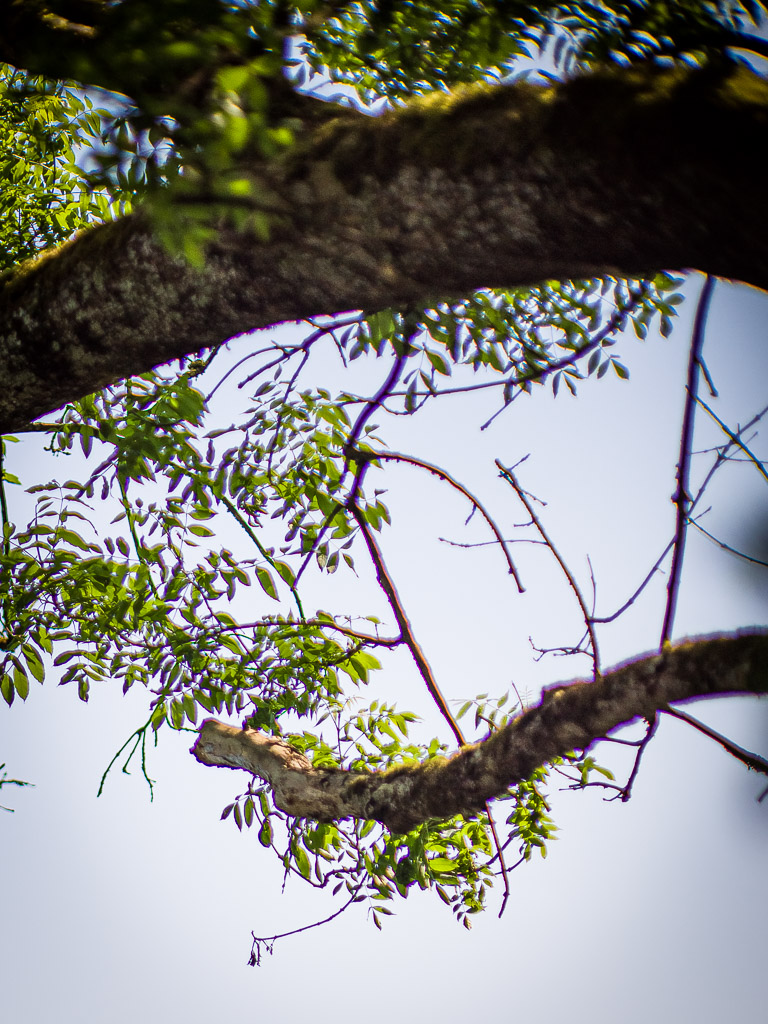
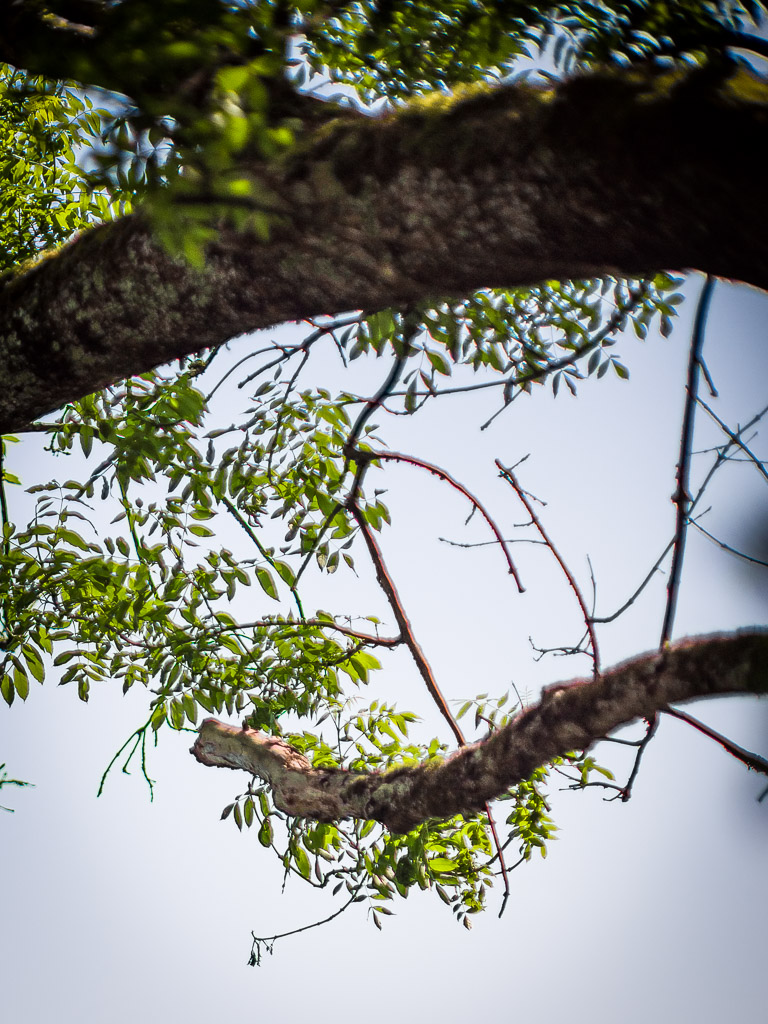
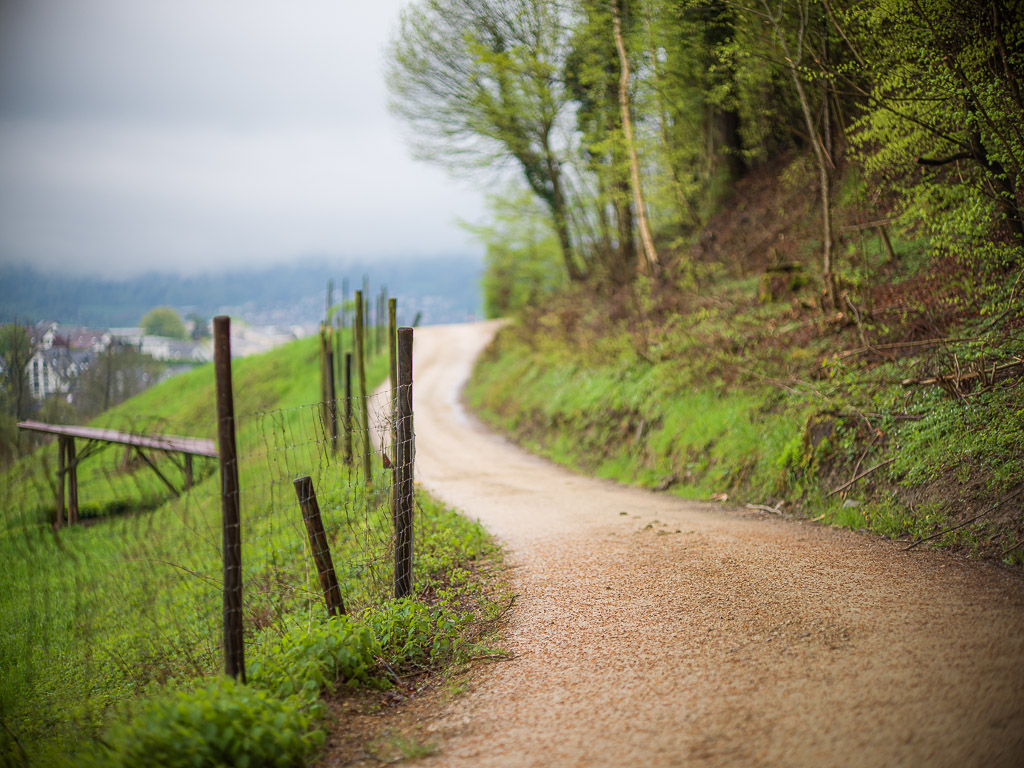
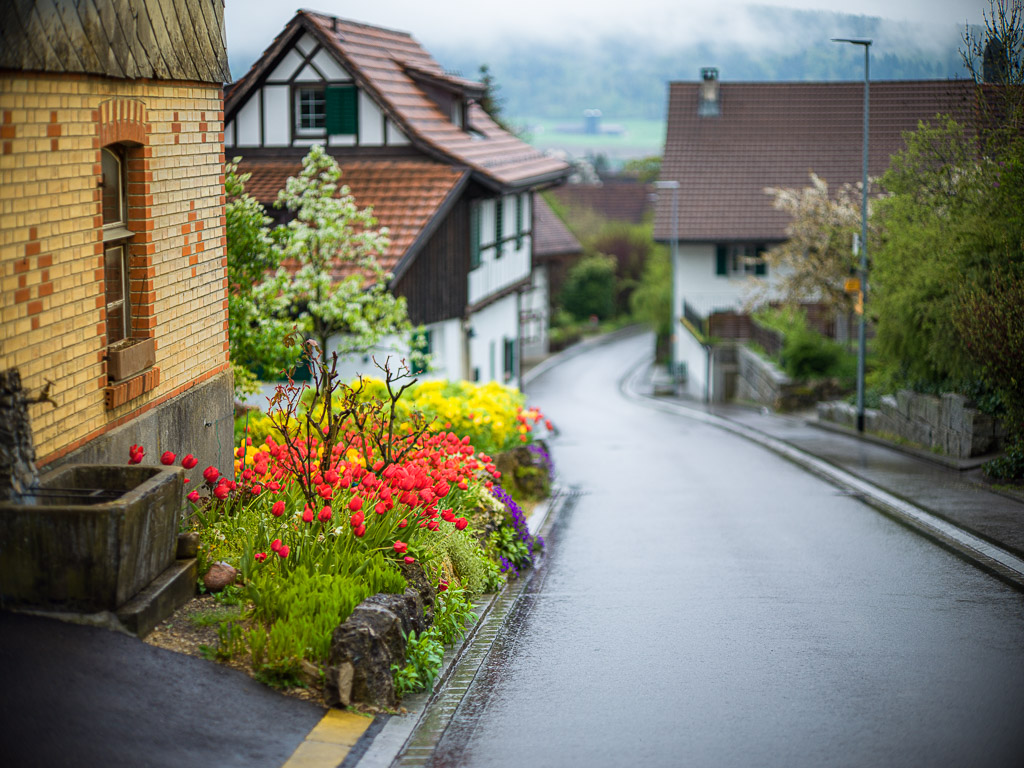
Finally, a gallery with more images without commentary; all shot at f1.25 and edited:


________________________________________________
Alle Fotos in den Beiträgen dieses Blogs unterliegen dem Copyright Enrico Caccia. Ohne meine ausdrückliche Genehmigung ist das Kopieren, Herunterladen, Vervielfältigen, Verteilen oder sonstige Verwenden dieser Bilder aus urheberrechtlichen Gründen nicht gestattet. Bei Interesse an einem der Bilder nehmen Sie bitte unverbindlich Kontakt mit mir auf.
For all photos in this blog: Copyright by Enrico Caccia, all rights reserved